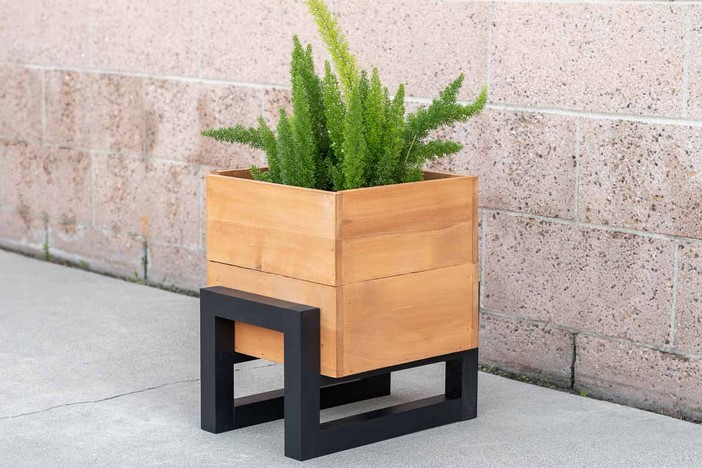
DIY Wooden Planters: Stylish and Functional Garden Projects
Source:https://www.anikasdiylife.com
Gardening offers an excellent opportunity to enhance the beauty of your outdoor space, but sometimes it requires a little creativity to elevate your garden’s design. One of the easiest and most rewarding ways to do so is by creating your own DIY wooden planters. These planters are not only functional for growing plants but can also serve as unique décor pieces that add rustic charm and personalized style to your garden or balcony. In this article, we will guide you through the process of making your own wooden planters, discuss the benefits of using wood, and offer ideas for customizing your planters to match your garden’s aesthetic.
Why Choose DIY Wooden Planters?
Wooden planters are an excellent choice for gardeners of all skill levels. The natural aesthetic of wood blends seamlessly into any garden setting, whether your style is modern, rustic, or traditional. But beyond aesthetics, there are several compelling reasons to choose DIY wooden planters for your garden projects.
1. Customizable Design
One of the greatest benefits of DIY wooden planters is the ability to customize their size, shape, and finish. Whether you prefer a sleek, modern design or a more vintage look with distressed wood, you can make your planters exactly as you envision them. DIY projects allow you to match the planters with your overall garden theme and the specific plants you wish to grow. You can opt for rectangular, square, or even circular designs, and experiment with various wood finishes such as staining, painting, or leaving the wood raw for a natural look.
Additionally, the size and depth of the planter can be tailored to suit the specific plants you plan to grow. For instance, if you’re growing deep-rooted vegetables, you can make a deeper planter, while shallow planters are perfect for succulents and herbs.
2. Cost-Effective
Buying pre-made wooden planters from stores can quickly add up, especially when you need several for a larger garden. On the other hand, making DIY wooden planters allows you to keep costs down. Wood is relatively affordable, and many basic materials can be sourced from your local hardware store or even repurposed from old furniture or pallets. Not only will this save you money, but it also adds an eco-friendly touch to your project by reusing materials that might otherwise go to waste.
3. Durability and Longevity
Wooden planters are known for their durability. When properly treated, they can withstand the outdoor elements for years. The natural strength of wood makes it resistant to weathering, and with a little care, your planters will continue to serve as sturdy homes for your plants season after season. Additionally, wooden planters have the added advantage of being lightweight compared to some stone or ceramic planters, making them easier to move around as your garden layout changes.
4. Enhancing Garden Aesthetics
Wood, being a natural material, enhances the organic feel of your garden. Whether placed along pathways, on balconies, or as part of a garden bed, DIY wooden planters can help organize and frame your garden, creating a tidy and aesthetically pleasing environment. You can use wood with visible grain to add texture or choose reclaimed wood for a weathered look that adds rustic charm.
Materials and Tools Needed for DIY Wooden Planters
Before you begin building your planters, it’s essential to gather the right materials and tools. Here’s a list of what you will need:
Materials:
- Wood: Pressure-treated lumber, cedar, redwood, or pine are excellent choices for wooden planters. Cedar and redwood are particularly resistant to rot and pests, making them ideal for outdoor use.
- Wood screws or nails: These will hold the planter together securely.
- Wood glue: For added reinforcement at the joints.
- Landscaping fabric or plastic liner: To line the inside of the planter and protect the wood from moisture damage.
- Outdoor paint or wood stain: To protect the wood from the elements and enhance its appearance.
Tools:
- Saw: A circular or miter saw will help you cut the wood to the desired lengths.
- Drill: For making pilot holes for screws or nails.
- Hammer or screw gun: For assembling the planter.
- Measuring tape: To ensure accurate measurements.
- Paintbrush: For applying paint or stain to the wood.
- Sandpaper or sander: To smooth out rough edges and surfaces.
Step-by-Step Guide to Building Your DIY Wooden Planters
Now that you have your materials and tools ready, let’s walk through the steps to build your custom wooden planters. This is a simple and rewarding project that requires basic carpentry skills.
1. Measure and Cut the Wood
The first step is to determine the size of your planter. Decide on the dimensions based on the plants you want to grow and the space where you will place the planter. For example, a standard rectangular planter might be 36 inches long, 12 inches wide, and 12 inches high. Using your measuring tape, mark the wood pieces according to your dimensions, and then use a saw to cut them to size.
You’ll need pieces for the sides, bottom, and corners. If you’re making a rectangular planter, you’ll need four long pieces (for the sides) and one or two shorter pieces (for the bottom).
2. Assemble the Frame
Once the wood pieces are cut, it’s time to assemble them. Start by attaching the sides of the planter to the corners using wood glue and screws. Drill pilot holes in the wood to prevent splitting, then screw the pieces together to form the frame of the planter.
After the sides are attached, secure the bottom piece in place using screws or nails. Make sure the bottom is flush with the sides and tightly attached to avoid any gaps.
3. Sand and Finish the Planter
Once your planter is assembled, take sandpaper or an electric sander to smooth out rough edges and surfaces. This will help prevent splinters and create a smooth, polished finish.
After sanding, it’s time to apply a protective coat of paint or wood stain to the exterior of the planter. Choose a color or stain that complements your garden design. For added protection against moisture, consider applying a weatherproof finish. This will extend the life of your planter, keeping it looking beautiful and preventing it from rotting or warping over time.
4. Line the Inside
To protect the wood from excessive moisture and prevent soil from seeping through the sides, line the inside of the planter with landscaping fabric or a plastic liner. Secure the liner with a staple gun or small nails. This step is especially important if you plan to place your planters directly on the ground or use them for vegetables or flowers that require significant water retention.
5. Fill with Soil and Plant
Now that your DIY wooden planter is complete, fill it with high-quality soil that suits the plants you intend to grow. Be sure to add any necessary drainage at the bottom, such as small rocks or gravel, to allow excess water to escape and prevent waterlogging.
Once your soil is in place, you can begin planting your flowers, herbs, or vegetables, and watch your garden thrive!
DIY wooden planters are an excellent way to combine functionality with creativity in your garden. These planters not only provide a practical solution for growing plants but also enhance the overall aesthetic of your outdoor space. Whether you are building a small herb garden for your balcony or large planters for your backyard, crafting your own wooden planters allows you to add a personal touch while staying within budget. By following the steps outlined in this article, you can create beautiful and durable planters that will not only serve your gardening needs but also become a stylish feature in your garden for years to come.