Precision Component Organization: Enhancing Workflow with the Magnetic Parts Tray
Source:https://storage.ghost.io
You are on hour four of replacing a finicky garbage disposal beneath a cramped, dimly lit kitchen sink. Your lower back is aching, your knuckles are scraped, and you are finally down to the last crucial step. You reach blindly onto the dark cabinet floor for the proprietary, tiny stainless steel locking screw you set down twenty minutes ago. Your fingers brush against something, and then you hear it: the heartbreaking clink-clink-tinkle of that irreplaceable screw bouncing directly down the open floor drain. Project halted.
Over my ten-plus years of managing home renovations, stripping down intricate power tools, and rebuilding machinery, I have discovered that a project rarely fails because of a lack of major skills. It fails because of a lack of micro-organization.
In my early days as a tradesman, I used to drop loose fasteners into my shirt pockets or scatter them across a piece of cardboard on the floor. I learned the hard way that a single rolling bolt can turn a two-hour repair into a frantic, weekend-long hunt for a rare replacement part. True workflow mastery requires a dedicated micro-anchoring zone, and incorporating a heavy-duty magnetic parts tray into your toolkit is the absolute simplest way to prevent these costly, project-stopping mistakes.
The Physics of Micro-Organization: Defying Friction and Gravity
When you disassemble any mechanical component—whether it is a bathroom faucet casing, a door lock set, or a lawnmower carburetor—you are dealing with tiny components that are subject to basic physics.
A workspace is an energetic environment. Every time you hammer a nearby joint, lean heavily against your workbench, or accidentally brush a sleeve against a surface, you introduce kinetic energy. Without a secure container, small metal screws, washers, and cotter pins act like microscopic balls on a pool table; they scatter at the slightest vibration.
Think of a high-quality magnetic parts tray as a temporary localized gravity well for your metallic components. It doesn’t just hold your fasteners using high walls; it utilizes a continuous magnetic flux field to lock them down. This ensures that even if you accidentally kick the tray across a concrete garage floor, every single tiny screw remains firmly anchored to the metallic basin.
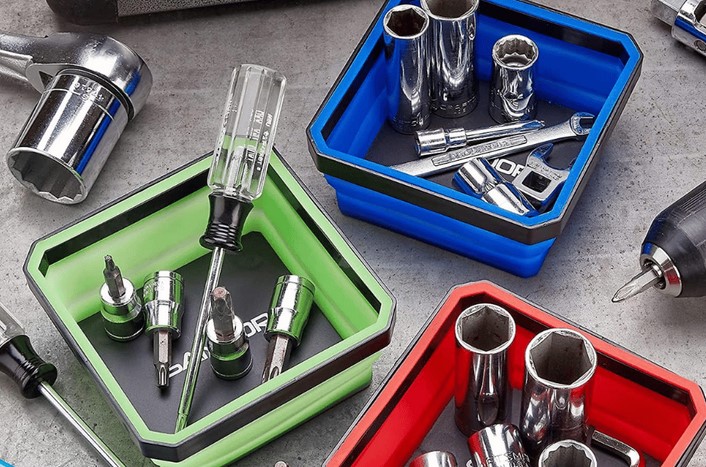
Anatomy of an Industrial Magnetic Parts Tray
When you browse the tool organization section of a hardware store, these trays look incredibly basic. However, selecting a high-durability unit requires analyzing a few key technical specifications.
Permanent Ferrite vs. Neodymium Magnets
The driving force behind your tray’s holding power is the magnetic element built directly into the base:
-
Ferrite (Ceramic) Magnets: These are the traditional choice for standard workspace trays. They are heavy, highly resistant to demagnetization over time, and offer plenty of pull-force to hold standard steel wood screws and bolts. They are cost-effective and perfect for general residential DIY use.
-
Rare-Earth Neodymium Magnets: This is what the pros use for vertical or inverted applications. Neodymium offers an incredibly dense magnetic field, allowing a compact tray to hold heavy hand tools like wrenches or sockets completely upside down against a vehicle frame or steel beam.
Base Substrates and Protective Coatings
Avoid unlined, cheap steel trays. A professional-grade magnetic parts tray features a deep-drawn bowl constructed from heavy-gauge stainless steel (typically SAE 304 or 430 grade), which naturally resists rust and chemical degradation from workshop oils.
More importantly, the entire magnetic base must be completely shrouded in a thick layer of non-marring rubber or PVC. This protective skin isolates the powerful magnetic pull, allowing you to slap the tray directly onto a client’s pristine car hood, a freshly painted washing machine jacket, or a delicate appliance surface without leaving behind deep scratches or leaving metallic scuffs.
Step-by-Step Protocol for an Optimized Project Workflow
Using a magnetic tray effectively is all about building a reliable mental habit. Here is the exact component organization sequence I teach my apprentices on their first day on the job.
1. The Deconstruction Mapping System
Do not just throw all your fasteners into a single pile inside the bowl. A great benefit of a wide magnetic parts tray is that the magnetic field is uniform across the entire steel floor. As you remove fasteners from a machine, arrange them inside the tray from left to right, mirroring the order of disassembly. This creates a spatial map of your project, making reassembly an effortless process.
2. Siting the Tray for Blind Muscle Memory
Place the tray within your immediate primary work radius—the zone you can reach comfortably with your dominant hand without shifting your posture or tilting your head. If you are working underneath a vehicle or a sink, look for a piece of exposed iron framing and mount the tray vertically or upside down directly next to your hands. This keeps your workspace organized and clear of clutter.
3. The Non-Magnetic Separation Step
Remember that your tray relies on magnetism. It will easily secure steel, iron, and nickel alloys, but it will completely ignore brass plumbing screws, aluminum trim rivets, plastic clips, and premium marine-grade 316 stainless steel fasteners. Group these non-magnetic items into one designated corner of the tray, relying on the physical depth of the bowl wall to keep them contained.
| Feature / Specification | Standard Consumer Tray | Industrial-Grade Magnetic Tray |
| Material Build | Thin Stamped Sheet Metal | Heavy-Gauge 304 Stainless Steel |
| Magnet Type | Small Low-Grade Strip | Large Ferrite Core or Neodymium Discs |
| Base Insulation | Bare Metal or Thin Sticker | Thick, Non-Marring Rubber Boot |
| Mounting Orientation | Horizontal Surfaces Only | Horizontal, Vertical, or Completely Inverted |
💡 Pro Tip: The Clean Sweep Trick
Over a long workday in a messy shop, your magnetic parts tray will naturally attract microscopic metallic dust, iron filings, and grinding debris. Cleaning this fuzz off by hand can be a nightmare. To clear it easily, place a clean plastic bag over the bowl before you start working, and put your parts on top of the plastic. When the job is done, pull the parts out, pull the plastic bag off away from the magnetic base, and all that annoying metallic sludge will lift away cleanly inside the bag.
Protecting Sensitive Electronics and Spark Hazards
Before you go slapping your powerful new magnetic tray down onto every available workspace surface, heed these two critical technical warnings:
-
The Electronic Distortion Zone: Modern homes are full of sensitive solid-state electronics. Never place a highly concentrated magnetic parts tray directly on top of smart home control hubs, laptop keyboards, digital control boards for smart appliances, or automotive engine control units (ECUs). The intense magnetic field can easily scramble delicate circuit traces or corrupt digital memory chips.
-
The Steel Splinter Hazard: When you drop sharp, heavy steel fasteners into a strong magnetic bowl from a distance, the magnet pulls them down with surprising velocity. If the tray is full of tiny, sharp metal splinters or iron filings, that sudden impact can launch small metallic debris upward directly toward your face. Always place components into the tray gently, and wear your safety glasses.
Conclusion: Take Total Control of Your Workspace Efficiency
Upgrading your home improvement game isn’t just about purchasing larger, faster power tools; it’s about eliminating the friction that slows your projects down. Incorporating a heavy-gauge, rubber-shrouded magnetic parts tray into your working routine keeps you focused on the task at hand rather than wasting precious time searching for a runaway bolt on your hands and knees. It is an inexpensive, simple piece of kit that instantly builds a more efficient workflow.
Now, I want to hear about your workflow setup! What project are you currently working on that has a lot of small moving parts, and have you ever had a missing screw disaster that almost ruined your weekend? Drop your stories, questions, or garage tips in the comments below—let’s build a sharper, more organized workspace together!