How to Make Your Own DIY Hanging Stuffed Animal Storage Solution
Looking to keep your child’s playroom organized and adorable? Our hanging stuffed animal storage solutions offer a charming and practical way to declutter the space while showcasing your little one’s favorite companions. With various styles and sizes available, you can say goodbye to scattered plush toys and hello to a neat and playful room.
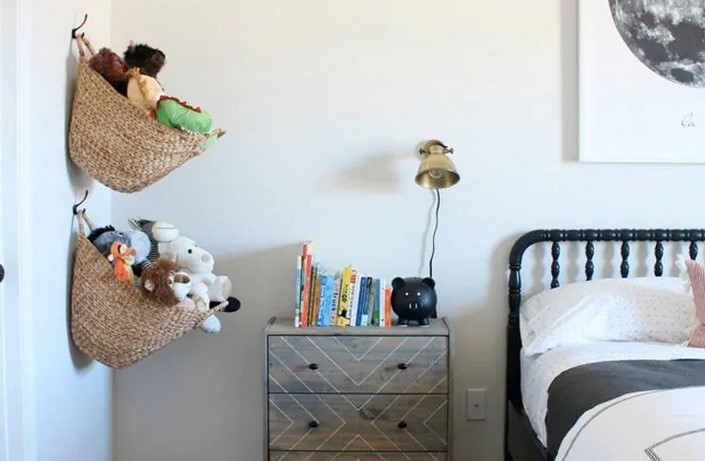
Stuffed animals have a magical way of multiplying in every corner of a child’s room. From cherished teddy bears to whimsical plush characters, these cuddly companions quickly become part of a child’s world. However, keeping them organized can be a challenge, and traditional storage solutions often fail to accommodate their growing numbers. That’s where a DIY hanging stuffed animal storage solution comes to the rescue. In this article, we will guide you through the process of creating a simple and efficient hanging storage system that not only keeps the room tidy but also adds a touch of creativity to the decor.
Benefits of a Hanging Stuffed Animal Storage
Before delving into the DIY process, let’s explore why a hanging storage solution is a smart choice for managing your child’s stuffed animal collection:
1. Maximizes Space: A hanging storage solution capitalizes on vertical space, freeing up valuable floor space for play and other activities.
2. Easy Access: Stuffed animals can be easily accessed and retrieved, promoting independence and encouraging children to put away their toys after use.
3. Decorative Element: A well-crafted hanging storage system can serve as an attractive decorative element in the room, adding both function and aesthetics.
4. Customizable: DIY projects offer the flexibility to tailor the storage solution to your room’s decor and your child’s preferences.
Materials You’ll Need
Before you begin, gather the necessary materials for this project:
1. Fabric: Choose a fabric that complements the room’s decor. Consider a sturdy fabric that can hold the weight of the stuffed animals.
2. Wooden Dowel: A wooden dowel will serve as the main support for your hanging storage. Choose a length that suits the space.
3. Rope or Cord: This will be used to suspend the dowel from the ceiling.
4. Hooks or Eye Screws: These will help secure the storage system to the ceiling.
5. Sewing Machine and Supplies: If you’re creating pockets for the stuffed animals, you’ll need a sewing machine, thread, and other sewing essentials.
Step-by-Step Guide
Follow these steps to create your own hanging stuffed animal storage solution:
Step 1: Measurements and Planning
Begin by measuring the space where you intend to hang the storage system. This will help you determine the appropriate length for the wooden dowel and the number of pockets you’ll need. Consider the dimensions of the stuffed animals to ensure the pockets are adequately sized.
Step 2: Creating the Pockets (Optional)
If you opt for a pocketed design, cut rectangular pieces of fabric according to your measurements. Leave an extra inch on each side for sewing allowances. Fold the top edge of each piece over and sew it to create a clean edge. Then, fold the remaining sides and bottom, sewing them together to form pockets. Attach these pockets to the main fabric panel.
Step 3: Attaching the Dowel Pocket
Fold the main fabric panel in half lengthwise with the right sides facing each other. Sew along the side and bottom edges, leaving the top open. This will create a pocket for the wooden dowel to slide through. Turn the fabric right side out and press it flat.
Step 4: Inserting the Wooden Dowel
Slide the wooden dowel through the pocket you’ve created in the fabric. This dowel will provide stability to the storage system.
Step 5: Attaching the Rope or Cord
Decide on the desired height for your hanging storage and cut the rope or cord to the appropriate length. Attach each end of the rope to the ends of the wooden dowel using secure knots. Make sure the dowel hangs evenly.
Step 6: Installing Hooks or Eye Screws
Install hooks or eye screws into the ceiling where you want to hang the storage system. Ensure that they are properly secured to support the weight of the stuffed animals and the dowel.
Step 7: Hanging the Storage System
Hang the storage system by attaching the ropes or cords to the hooks or eye screws in the ceiling. Adjust the height as needed.
Step 8: Organizing Stuffed Animals
Gather your child’s stuffed animals and arrange them in the pockets or simply drape them over the wooden dowel. Encourage your child to organize their stuffed animals by type, size, or favorite characters.
Step 9: Enjoying the Results
Stand back and admire your DIY hanging stuffed animal storage solution. Not only does it provide an efficient way to manage clutter, but it also adds a personalized touch to the room’s decor. Your child will enjoy easy access to their beloved stuffed animals while learning valuable organizational skills.
A DIY hanging stuffed animal storage solution is a creative and practical way to tackle the clutter that often accompanies a child’s collection of plush companions. By utilizing vertical space and combining functionality with aesthetics, this project not only keeps the room organized but also enhances its visual appeal. Through a few simple steps and with readily available materials, you can create a storage system that promotes independence, creativity, and a sense of accomplishment for both you and your child. So, gather your materials, follow the steps, and embark on this enjoyable journey of crafting a storage solution that will delight your child and contribute to a tidier, more organized living space.