DIY Reclaimed Wood Shelves: A Step-by-Step Guide
Source:https://enthrallinggumption.com
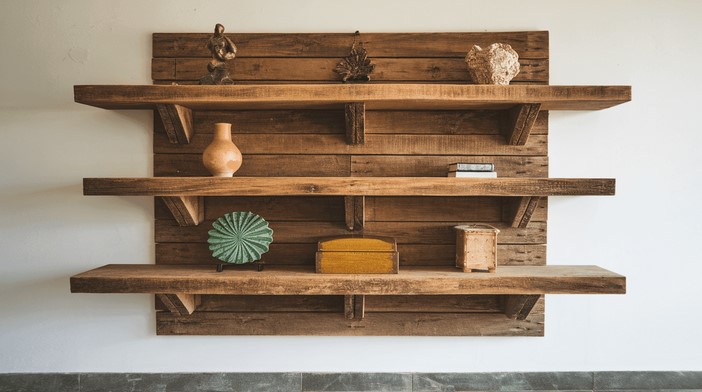
If you’re looking to bring a rustic charm or eco-conscious style into your home, DIY reclaimed wood shelves can be the perfect addition to your space. Reclaimed wood offers a unique, weathered look that can’t be replicated, making it a favorite for many homeowners and DIY enthusiasts. These shelves not only enhance the aesthetics of a room but also serve as practical storage solutions. Whether you’re trying to organize your kitchen, living room, or home office, building reclaimed wood shelves yourself is a rewarding project that will add both function and beauty to your home. This step-by-step guide will walk you through the entire process—from gathering materials to installing your custom shelves.
Why Choose Reclaimed Wood for Shelves?
Reclaimed wood is a great material choice for various reasons, especially when it comes to creating DIY reclaimed wood shelves. Let’s explore some of the key benefits:
- Sustainability: Using reclaimed wood helps reduce the environmental impact of logging and deforestation. By repurposing wood from old barns, factories, and homes, you’re giving it a new life, which is a more eco-friendly option than using new lumber.
- Unique Aesthetic: Every piece of reclaimed wood tells a story. From the visible grain patterns to the rich colors and textures, reclaimed wood offers a natural, weathered charm that you can’t achieve with new materials. This rustic and vintage appeal makes it ideal for creating shelves that stand out in any room.
- Durability: Many reclaimed wood pieces are sourced from old-growth timber, which is denser and more durable than much of the wood available today. As a result, your shelves will be strong and long-lasting, able to support heavy items like books, vases, or kitchenware.
- Cost-Effective: Depending on where you source it from, reclaimed wood can be more affordable than new wood. Plus, when you complete the project yourself, you save on labor costs, making it a cost-effective solution for creating custom shelves.
With these benefits in mind, let’s move forward with building your own DIY reclaimed wood shelves.
Step-by-Step Guide to Building DIY Reclaimed Wood Shelves
Now that you’re convinced that reclaimed wood is the right choice for your project, let’s walk through the steps involved in building your own shelves. From selecting materials to final installation, here’s how you can do it.
1. Gather Materials and Tools
Before you begin, it’s essential to gather all the materials and tools needed for the project. Here’s a list of what you’ll need:
- Reclaimed wood planks: Select wood that’s in good condition. Look for pieces that don’t have significant warping, rot, or insect damage. You’ll need enough planks to cover the length and width of the shelves you want to create.
- Shelf brackets: You can choose metal or wooden brackets based on your desired aesthetic. Make sure the brackets are strong enough to support the weight of your shelves and whatever items you plan to store.
- Screws: Choose wood screws that are long enough to securely attach the shelves to the brackets.
- Sandpaper or electric sander: To smooth out the rough edges and surfaces of the reclaimed wood.
- Wood stain or paint (optional): If you prefer to alter the wood’s color or add a protective finish, wood stain or paint is optional.
- Measuring tape: To measure the space for your shelves and the wood planks.
- Level: This will ensure that your shelves are perfectly horizontal once installed.
- Drill: To drill pilot holes for screws and to attach the brackets to the wall.
2. Prepare and Clean the Wood
Reclaimed wood may have nails, staples, or other remnants from its previous life. Start by cleaning and preparing the wood for your project:
- Remove nails and staples: Use a hammer or pliers to remove any nails, screws, or staples that may still be attached to the wood.
- Inspect the wood: Check for any significant cracks, rot, or warping. You may need to discard any severely damaged pieces.
- Sand the surface: Use a sanding block or electric sander to smooth out the wood. This will remove any splinters and rough edges, as well as smooth the surface. Don’t sand too much—leave some of the wood’s natural character intact for a more authentic, rustic look.
- Stain or paint the wood (optional): If you prefer a darker or lighter look, now is the time to apply a wood stain. For a more modern or colorful touch, you can also paint the wood. Ensure the stain or paint is fully dry before moving on to the next step.
3. Measure and Cut the Wood
Accurate measurements are critical when it comes to cutting your wood pieces. Measure the space where you intend to install the shelves to determine how long and wide each plank should be.
- Measure the shelf length: Measure the wall space where the shelf will go. Make sure to account for any obstacles, such as electrical outlets or light switches.
- Cut the wood: Using a saw, cut the reclaimed wood planks to the correct length and width for your desired shelf. You can make multiple shelves if needed, depending on how much space you want to cover.
- Smooth the edges: After cutting, sand any rough edges to ensure they are smooth and safe to handle.
4. Install the Brackets
Now that your shelves are prepped, it’s time to install the brackets onto the wall.
- Mark bracket positions: Measure and mark where you want the brackets to be placed. Ensure that the markings are level, so the shelves will be evenly positioned once installed.
- Drill pilot holes: Using a drill, create small pilot holes in the wall where the screws will go. If you’re drilling into drywall, use wall anchors to ensure the brackets hold securely. If you’re drilling into studs, the screws can go directly into the wood.
- Attach the brackets: Use screws to attach the brackets to the wall. Make sure they are tightly secured to support the weight of the shelves.
5. Attach the Shelves
Now that the brackets are installed, it’s time to add your reclaimed wood planks.
- Place the wood on the brackets: Position the reclaimed wood onto the installed brackets. Make sure the shelves are centered and level.
- Secure the shelves: Once the shelves are properly positioned, use screws to attach the reclaimed wood to the brackets. This will ensure that the shelves stay in place and can bear weight.
- Check for level: After attaching the shelves, use a level to make sure they are perfectly horizontal. Adjust if necessary.
6. Final Touches
Once the shelves are securely in place, take a moment to inspect your work. If needed, apply a coat of clear polyurethane or another protective finish to protect the wood from moisture or wear. You can also decorate your shelves with books, plants, or other decorative items to complete the look.
In conclusion, DIY reclaimed wood shelves are a wonderful way to create custom storage solutions that are both functional and aesthetically pleasing. The process of building your own shelves from reclaimed wood allows you to showcase your craftsmanship while adding a unique, rustic element to your home. Whether you’re designing shelves for the kitchen, living room, or office, reclaimed wood offers durability, character, and environmental benefits. With the step-by-step guide above, you can confidently take on this project and create beautiful, long-lasting shelves that enhance your space.