Precision Plumbing Sealing: Maintaining Leak-Free Systems with Plumbing Putty Tub
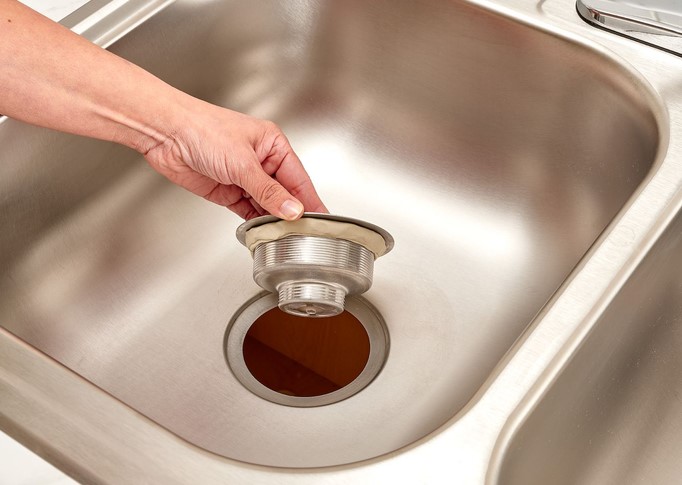
Source:https://www.thespruce.com
At 11:30 PM on a Friday night, my phone buzzed violently. It was a panicked text from a client whose newly renovated kitchen cabinet floor had just transformed into a warped, soggy sheet of ruined particleboard. The culprit wasn’t a burst pipe or a high-pressure blowout; it was a slow, microscopic, malicious drip originating from the lip of the kitchen basket strainer. The client had spent hours trying to solve it by smearing an entire tube of messy silicone caulk around the threads, yet the water kept finding a way out.
Over my ten-plus years operating in the residential plumbing and remodeling sector, I have diagnosed hundreds of structural moisture failures. The most common mistake I see intermediate DIYers make is treating every single plumbing connection like it needs to be permanently glued together.
When you need a watertight seal on non-pressurized joints—like drain flanges, faucets, and pop-up assemblies—you don’t want an adhesive that cures into a rigid plastic brick. You need a material that remains infinitely flexible, hydro-repellent, and easy to service decades down the road.
That is exactly why an unpretentious, industrial-grade plumbing putty tub remains the most critical asset in my field kit. Let’s dive deep into the material science, chemical compatibility, and installation protocols required to master precision plumbing sealing.
The Mechanics of Material Flexibility: What is Inside a Plumbing Putty Tub?
To understand why this compound is so effective, we must look past its gray, clay-like appearance and evaluate its underlying chemistry. Traditional plumber’s putty is a highly engineered blend of calcium carbonate (whiting), refined linseed oil, and specific elastomer plasticizers.
Think of using a product from a plumbing putty tub like working with a customized, heavy-duty version of childhood play-dough. Instead of drying out and cracking when exposed to the air, the oil-saturated clay forms a dense, non-hardening compound that acts like a custom-molded rubber gasket engineered in real time to match the microscopic contours of your plumbing fixtures.
[Metal Flange] -> [Microscopic Surface Cracks] <- [Pliable Putty Ring] -> Perfect Seal
[Metal Flange] -> [Rigid Cured Silicone Caulk] <- [Structural Shifting] -> Seal Fractures
Because it never truly cures, the putty maintains a dynamic hydraulic seal. When your home naturally shifts, or when you fill a massive kitchen sink with fifty pounds of water and dishes, the putty flexes under the weight without fracturing its bond to the substrate.
The Strategic Choice: Putty Tub vs. Silicone Elastomers
A major point of confusion for intermediate home improvement enthusiasts is knowing when to open a plumbing putty tub and when to reach for a tube of 100% silicone sealant. Using the wrong product can turn a simple fixture swap into a nightmare.
| Operational Criteria | Plumber’s Putty (From Tub) | 100% Silicone Sealant |
| Curing Process | Non-hardening; remains pliable indefinitely | Chemical cure; turns into flexible rubber |
| Clean-up Dynamic | Mechanical tear-off; zero residue on hands | Solvent-based; sticky and requires rubbing alcohol |
| Re-servicing Capability | Exceptionally easy to scrape away and replace | Difficult; requires mechanical scraping and scraping gel |
| Best Application | Compression joints, drain flanges, faucet bases | High-pressure lines, underwater seams, glass joints |
The general rule of thumb from my years in the field is simple: If the joint relies on mechanical compression (like a locknut tightening a drain flange against porcelain), use your putty tub. If the joint relies on sheer adhesion to hold pieces together without mechanical fasteners, silicone is your weapon of choice.
Step-by-Step Execution: Fabricating the Perfect Putty Ring
Achieving a leak-free seal requires precision hand technique. Simply grabbing a handful of compound and stuffing it into a joint will guarantee a plumbing failure. Follow this exact field protocol for a professional installation.
Step 1: Substrate Remediation and Prep
Before applying a fresh seal, you must completely remove every trace of old, degraded compound. Use a plastic putty knife to scrape the mating surfaces clean, then wipe the area down with a microfiber cloth soaked in mineral spirits. Any lingering grease or old lime scale will prevent the new putty from bonding to the fixture.
Step 2: Kneading and Thermal Activation
Open your plumbing putty tub and scoop out a golf-ball-sized portion. The compound will likely feel stiff initially. Spend 60 seconds kneading it actively between your palms; your natural body heat will break down the viscous linseed oils, transforming the material into a highly malleable, silk-smooth consistency.
Step 3: Rolling the “Plumbing Snake”
Place the activated putty on a clean, non-porous surface or rub it between your hands to roll it into a continuous, uniform rope. Aim for a consistent thickness of roughly 1/2 inch to 3/8 inch. Ensure there are no air pockets or thin fractures along the entire length of the rope.
Step 4: Compression and Seating
Lay the putty rope in a complete, uninterrupted loop around the underside of the drain flange or faucet base. Drop the fixture into the sink opening and apply firm, even downward pressure.
As you tighten the mechanical locknut underneath the sink with your channel locks, you will see excess putty cleanly squeeze out from the sides above. This “squeeze-out” is your visual proof that the void has been completely packed with no hidden air gaps.
💡 Pro Tip: The Clean Tear-Off Hack
Do not use a sharp utility knife to cut away the excess putty that squeezes out around the finished drain rim. Metal blades will permanently scratch your expensive brushed nickel or chrome finishes. Instead, use a dull plastic scraper or simply use your finger to pin the excess material against the rim and peel it away. The putty will naturally tear along the seam, leaving a perfectly flush, invisible boundary line.
The Porous Stone Bleeding Trap
Here is a critical warning that every home improvement enthusiast must memorize: Never use standard oil-based putty on porous natural stone surfaces.
If you are installing a high-end undermount sink onto a luxury countertop made of granite, marble, quartz, or unglazed travertine, the linseed oil inside a standard plumbing putty tub will physically migrate into the micro-pores of the stone. Within a few weeks, a dark, unsightly, greasy halo stain will appear around your drain rim. This oil stain is practically impossible to remove without replacing the entire slab.
For all natural stone installations, you must specifically purchase an oil-free, synthetic polymer plumbing putty. These specialized formulas provide identical sealing characteristics without the risk of chemical migration and staining.
Building a Long-Lasting Home Infrastructure
Mastering the precise deployment of a plumbing putty tub is a fundamental milestone for anyone serious about high-quality home improvement. It teaches you that proper mechanical engineering often outlasts high-tech chemical glues. By learning how to properly knead, size, and compress your seals while respecting material compatibility, you protect your home from devastating water damage and ensure your plumbing fixtures remain fully functional for decades.
Are you preparing to tackle a kitchen sink upgrade or swap out an old bathroom pop-up drain this weekend? Have you checked what type of countertop material you are working with before choosing your sealant? Let me know your project details and questions in the comments below—let’s get your plumbing perfectly sealed!