Industrial Tool Management: Securing Equipment with the Hammer Hook Metal
Source:https://m.media-amazon.com
You are balancing on the top rung of an eight-foot A-frame ladder, holding a sheet of tongue-and-groove cedar ceiling plank perfectly in place with one hand. You reach down to your tool belt for your framing hammer to lock it down, but your hip bumps against the ladder rail. In a split second, your $60 steel framing hammer slips, plummets through the air, and crashes directly into the expensive, newly laid hardwood floor below—narrowly missing your helper’s head.
Over my ten-plus years of managing active job sites and setting up commercial workshops, I have witnessed this exact stomach-churning drop happen more times than I care to admit. Tool storage isn’t just about keeping your workspace tidy; it is a critical component of operational safety and kinetic management.
Early in my contracting career, I relied on flimsy fabric loops or cheap plastic clip-on holsters to carry my striking tools. I learned the hard way that when you are working under intense physical conditions, those soft loops warp, stretch, and fail. True industrial-grade tool management requires a rigid mechanical anchor, and upgrading your setup to a heavy-duty hammer hook metal component is the absolute best way to secure your gear and protect your property.
The Physics of Tool Retainment: Why Soft Loops Fail
Many intermediate DIYers buy a basic canvas tool apron and assume they are fully equipped for a major renovation. However, standard fabric or leather loops suffer from severe elastic deformation over time.
Every time you drop a heavy tool into a leather loop, the kinetic energy stretches the material out just a fraction of a millimeter. Within six months of consistent use on a job site, that tight loop becomes loose, stretched out, and structurally compromised.
Think of a stretched-out leather loop like an oversized shoe—it might hold the tool while you are standing completely still, but the moment you climb a flight of stairs or lean forward to check a level, the center of gravity shifts. The tool tilts, slides out of the loose pocket, and becomes a hazardous falling object. A rigid hammer hook metal assembly eliminates this elasticity entirely by providing a solid, unyielding structural cradle that maintains its exact geometric dimensions under heavy daily loads.
Material Metallurgy: Decoding Heavy-Duty Tool Hooks
When you browse the tool organization aisle at a hardware store or specialized supply house, you will see hooks made from various materials. Let’s break down the technical metallurgy so you can choose a system that will outlast your entire tool collection.
Zinc-Plated Steel vs. Stainless Steel vs. Aircraft Aluminum
The alloy composition of your hook dictates its structural payload capacity and how it will handle environmental stress:
-
Zinc-Plated Carbon Steel: This is the workhorse of industrial tool management. It offers immense tensile strength and rigidity at an accessible price point. The thin layer of zinc plating prevents immediate surface oxidation (rust), making it excellent for dry workshops and standard garage builds.
-
314 or 316 Stainless Steel: If you frequently work outdoors in coastal regions, high-humidity environments, or rainy climates, stainless steel is non-negotiable. It contains chromium and nickel, creating a self-healing oxide layer that prevents deep corrosion, even if the metal gets deeply scratched by your tool’s steel claw.
-
Anodized Aircraft-Grade Aluminum: This is the premium choice for wearable tool belts. It provides the rigid strength of steel but cuts the weight of the hook down by roughly 60%. When you are carrying a tool belt for ten hours a day, reducing your dead-weight load prevents lower back strain and hip fatigue.
Anatomy of an Industrial Hammer Hook Metal System
A professional-grade hardware hook isn’t just a bent piece of wire; it features specific structural engineering details designed to manage tool dynamics.
Cradle Geometry and the Anti-Swing Feature
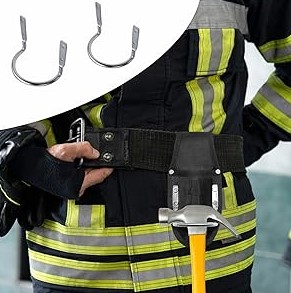
Look for a hook that features a deep, u-shaped curve accompanied by a slight upward flare at the front tip. This specific geometry forces the heavy head of your hammer to settle naturally into the absolute lowest point of the metal cradle.
Premium hammer hook metal variants also incorporate an aggressive anti-swing backing plate. This wide metal flap sits flat against your thigh or workshop pegboard, preventing the heavy handle of your tool from pendulum-swinging back and forth while you walk or work, keeping your gear perfectly stabilized against your body.
Step-by-Step Guide to Organizing a High-Output Workspace
Whether you are configuring a wearable framing rig or organizing a modular French cleat wall system in your garage, implement this precise setup to optimize your workflow speed.
1. Establish Your Muscle-Memory Zone
The key to high-output tool management is never having to look down to find your equipment. If you are right-handed, mount your primary hammer hook metal assembly on your dominant side hip, roughly two inches behind the centerline of your pants seam. This placement keeps the tool completely clear of your knee movement while placing the handle exactly where your fingers naturally drop when your arm relaxes.
2. Secure the Mounting Flange
Never rely on single, short drywall screws to hold a tool hook to a wall. A standard framing hammer combined with the physical force of dropping it into a holder can easily pull a weak fastener straight out of the wall. Always secure your metal hooks directly into solid wood studs or a minimum $\frac{3}{4}\text{-inch}$ plywood backing sheet using heavy-duty, coarse-threaded panhead screws.
3. Check the Retention Tension
If your hook features an integrated spring-loaded retention clip, check the pressure before loading your tool. The clip should require a firm, deliberate push to open, ensuring that if you accidentally bump into a piece of scaffolding or furniture, the hook won’t accidentally release your gear.
| Technical Metric | Consumer Soft Loop | Industrial Metal Hook |
| Material Build | Stitched Canvas / Split Leather | Galvanized Steel / Aircraft Aluminum |
| Weight Capacity | 3 to 5 lbs max before sagging | 25 to 50+ lbs (Rigid Structural Load) |
| Lifespan | 6 to 12 months under heavy use | Lifetime Warranty / Indestructible |
| Deformation Rate | High (Stretches and loses shape) | 0% under standard working payloads |
The Danger of Corner Gouging and Sharp Burrs
Before you slap any cheap metal bracket onto your expensive leather tool belt or pristine workshop wall, look closely at the edges of the mounting plate. Lower-grade manufactured hooks are stamped out of sheet metal quickly, often leaving behind microscopic, razor-sharp metallic ridges along the back seams called burrs.
Over weeks of movement, those hidden burrs act like a miniature saw blade, chewing through your tool belt stitching, ruining your clothing, or digging deep scratches into your painted garage walls. Always run your thumb along the back edges of a new hook before installing it. If you feel a sharp edge, take a piece of 120-grit emery cloth or a fine metal file and smooth the profile out until it is completely rounded and safe.
Conclusion: Build a Bulletproof Workspace Setup
Upgrading your home improvement toolkit with a rugged, professionally manufactured hammer hook metal component shifts your project workflow from chaotic to completely optimized. By ditching weak fabric loops, selecting high-tensile alloys like stainless steel or aircraft aluminum, and mastering your muscle-memory placement, you protect your home finishes from expensive accidental damage while keeping your vital tools instantly accessible.
Now, let’s hear about your workshop configuration! What is your current tool belt setup or wall organization system like, and have you ever had a heavy tool drop drop that caused a major headache? Drop your stories, questions, or workspace photos in the comments section below—let’s build a safer, more efficient workspace together!