Maximizing Thermal Efficiency: The ROI of the Attic Radiant Barrier
Source:https://texasproinsulators.com
It’s 2:00 PM on a sweltering July afternoon. Your AC is screaming, running at full tilt for the fourth hour straight, yet the second floor of your home still feels like the inside of a pizza oven. You check the thermostat—it says 24°C, but your skin says otherwise. The culprit isn’t your air conditioner; it’s the giant, invisible radiator sitting right above your head: your attic.
In my decade of crawling through sweltering crawlspaces and performing energy audits, I’ve seen attic temperatures hit a staggering 65°C (150°F). That heat doesn’t just sit there; it migrates. Most homeowners try to fight this by piling on more fiberglass insulation, but they’re missing a fundamental law of physics.
Traditional insulation is like a sponge—it slows down heat soak. But an Attic Radiant Barrier? That’s your home’s suit of armor. I’ve seen properly executed barrier installs slash cooling costs by 10% to 17% in hot climates, and today, I’m going to show you exactly how to capture that ROI.
1. The Physics of the “Space Blanket”: How it Works
To understand the value of an Attic Radiant Barrier, you have to understand that heat travels in three ways: conduction, convection, and radiation. Traditional “fluffy” insulation (fiberglass or cellulose) only handles the first two. It’s helpless against radiant heat from the sun.
The Analogy: Imagine standing outside on a hot day. Traditional insulation is like wearing a thick wool sweater; it might stop a breeze, but you’re still baking under the sun. A radiant barrier is like holding a high-quality umbrella. It reflects the sun’s “arrows” before they ever touch your clothes.
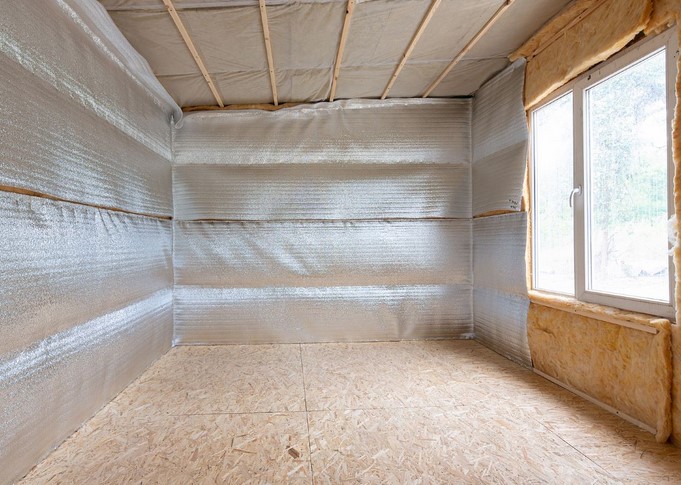
By installing a highly reflective material (usually aluminum foil bonded to a substrate), we are reflecting up to 97% of radiant heat back toward the roof shingles rather than letting it absorb into your attic floor and ductwork.
2. Evaluating Your ROI: Is It Worth the Investment?
I’m often asked, “Will this actually pay for itself?” The answer depends heavily on your geography and your current attic “ecosystem.”
-
Hot Climates (The Sweet Spot): If you live in a region where cooling dominates your utility bill, the ROI is massive. By lowering attic temperatures by up to 30 degrees, your AC ductwork (which usually lives in the attic) doesn’t have to work nearly as hard to keep the air cold.
-
The Comfort Factor: Beyond the dollars, there is the “upstairs relief.” If your bedroom is directly under the attic, a radiant barrier can be the difference between a restless, sweaty night and a deep sleep.
-
Resale Value: Energy-efficient homes are selling faster in 2026. Documenting a professional Attic Radiant Barrier installation is a powerful “green” selling point.
3. Installation Methods: Foil Scrim vs. Radiant Chips
In the home improvement world, there are two main ways we tackle this, and I have a very strong preference based on years of “post-op” inspections.
Radiant Barrier Foil (The Pro Choice)
This involves stapling large rolls of reinforced foil to the bottom of your roof rafters.
-
Pros: Extremely high reflectivity; creates an air gap (essential for the physics to work).
-
Cons: Labor-intensive; requires careful maneuvering around roofing nails.
Spray-on Radiant Barriers
These are specialized paints containing reflective flakes.
-
The Reality Check: While easier to apply, they typically only reflect 75-80% of heat compared to the 97% of foil. I usually only recommend this for attics with incredibly complex geometries where stapling is physically impossible.
4. The Technical Blueprint: Executing the Perfect Install
If you’re a mid-level DIYer, you can do this yourself, but you must respect the Emissivity and Reflectivity ratings. Look for products that meet the ASTM C1313 standard.
Step-By-Step “Expert” Workflow:
-
The Air Gap Rule: A radiant barrier must face an open air space to work. If you sandwich it between two solid materials, it becomes a conductor, not a reflector. Always leave at least 1-2 inches of space.
-
Start from the Ridge: Work from the top down. Use a heavy-duty slap-stapler.
-
Dust is the Enemy: Here is an insight most blogs miss: Reflectivity drops as dust accumulates. This is why I always recommend stapling to the rafters (facing down) rather than laying it on top of the attic floor insulation.
-
Safety First: Wear a respirator, eye protection, and a head lamp. You are working in a forest of sharp roofing nails and itchy insulation.
5. Avoiding the “Moisture Trap”: A Hidden Warning
This is the part where an amateur can accidentally damage their home. Aluminum foil is a vapor barrier.
Peringatan Tersembunyi (Hidden Warning): If you live in a climate with cold winters and you lay a solid, non-perforated foil over your floor insulation, you will trap rising moisture from the house. This leads to mold, rot, and structural failure. >
Tips Pro: Always use Perforated Attic Radiant Barrier material. These have thousands of microscopic pinholes that allow moisture (vapor) to escape while still reflecting 97% of radiant heat.
6. LSI Keywords & Efficiency Checklist
Before you head to the hardware store, make sure you can check off these technical requirements for a high-efficiency system:
-
Solar Reflectance: Should be 0.90 or higher.
-
Thermal Emittance: Should be 0.10 or lower (this measures how much heat the material “gives off”).
-
Soffit and Ridge Vents: A radiant barrier works best when there is active airflow. Ensure your ventilation isn’t blocked by the foil.
-
Ductwork Insulation: If your ducts are in the attic, wrap them in R-8 insulation after the barrier is installed for a “double-punch” of efficiency.
7. The Cumulative Effect: Integrating with R-Value
Don’t make the mistake of thinking a radiant barrier replaces your pink fiberglass insulation. They are teammates, not competitors.
While the Attic Radiant Barrier handles the “light” (radiant heat), your bulk insulation handles the “soak” (conductive heat). When you combine a radiant barrier with a proper R-49 or R-60 insulation level, you are creating a thermal envelope that is virtually impenetrable by summer heat.
Conclusion: Reclaiming Your Comfort
Installing an Attic Radiant Barrier is one of the most satisfying high-ROI projects you can undertake. It’s a silent, passive system that works 24/7 to protect your wallet and your comfort.
In my ten years of experience, I’ve never had a client regret “shielding” their home. You stop fighting the sun and start living in a home that maintains its temperature with ease.
Is your second floor significantly hotter than your first? Have you checked your attic temperature lately? Let’s talk about your current insulation levels in the comments and see if a radiant barrier is the missing piece of your home’s puzzle!