Maximizing Vertical Asset Storage: Strategic Utility of Attic Floor Boarding
Source:https://www.fivestarshomeinspection.com
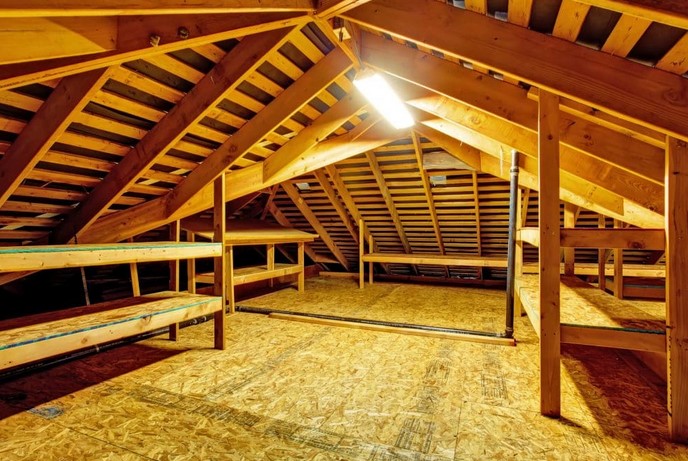
You’re standing on a step ladder, peering into that dark, dusty triangle above your ceiling. You see a vast “no-man’s land” of exposed joists and fluffy pink insulation. You need more space—your garage is bursting and the spare bedroom has become a staging ground for holiday décor—but you hesitate. You’ve heard the horror stories of homeowners putting a foot through the drywall ceiling or, worse, crushing their insulation and sending their energy bills skyrocketing.
In my decade of traversing tight crawlspaces and performing structural audits, I’ve realized that the attic is the most undervalued “vertical asset” in the modern home. Most people see a hazard; I see 300 square feet of untapped potential. However, executing Attic Floor Boarding correctly requires more than just throwing some plywood over the beams.
If you treat your attic floor like a standard bedroom floor, you’re making a tactical error. Today, I’m pulling from ten years of site experience to show you how to engineer a storage platform that is safe, efficient, and protective of your home’s thermal envelope.
1. The Physics of the Joist: Why You Can’t Just “Lay it Down”
The biggest mistake beginners make with Attic Floor Boarding is ignoring the “depth” of their insulation. Most modern building codes require attic insulation to be significantly thicker than the height of your ceiling joists.
Think of your attic insulation like a goose-down duvet. If you sit on a duvet, it loses its “loft” and stops keeping you warm. Insulation works by trapping air; the moment you squash it down with a heavy board, you destroy its R-value (thermal resistance).
In my early years, I visited a house where the owner had boarded his entire attic directly onto the joists. His heating bill had jumped by 20% because he had essentially “squeezed” the life out of his thermal barrier. To do this right, we have to build up, not just over.
2. Engineering the Elevated Platform: Loft Legs and Raised Rails
To maximize your storage without sacrificing efficiency, you need to implement a raised system. This is what we call “floating” the floor.
The Loft Leg Revolution
Instead of nailing timber directly to joists, we use Loft Legs—high-strength, recycled plastic stilts that screw into the joists and support the boards about 175mm above the beams.
-
The Benefit: It allows you to maintain the full, uncompressed depth of your mineral wool or fiberglass insulation.
-
Airflow: It creates a vital air gap between the insulation and the boards, preventing “interstitial condensation.”
Cross-Battening
If you prefer traditional materials, we use a technique called cross-battening. We run a new set of timber beams perpendicular to the existing joists. This not only gives you the height needed for insulation but also distributes the “dead load” of your stored items more evenly across the structure.
3. Material Selection: Plywood vs. Tongue and Groove
When selecting your Attic Floor Boarding materials, weight and maneuverability are your primary constraints. You are likely working through a small hatch—don’t try to lug a 4×8 sheet of 3/4″ plywood up there alone.
-
Tongue and Groove (T&G) Loft Panels: These are usually 18mm thick and come in manageable sizes (approx. 1200mm x 325mm). They slot together like a jigsaw puzzle, which helps distribute the load across multiple boards.
-
Chipboard vs. OSB: While standard chipboard is common, I prefer OSB3 (Oriented Strand Board) for attics. It handles the humidity fluctuations of an unconditioned attic space much better than standard particle board, which tends to swell and “flake” over time.
4. The Technical LSI Checklist: Load Bearing and Safety
Before you start hauling heavy boxes of old college textbooks into the rafters, you must understand Static vs. Dynamic Loads.
-
The Ceiling Joist Warning: In many modern “truss” roofs, the bottom chords (the beams you walk on) are designed only to hold the weight of the drywall and the tension of the roof—not a 200lb person plus 500lbs of storage.
-
The “Center-to-Center” Rule: Standard joist spacing is usually 16 or 24 inches. If your joists are wider than 24 inches, your boarding needs to be thicker to prevent “sagging” or structural failure.
-
Crawl Boards: Never step off a board onto the “pink stuff.” I always keep a pair of 2-foot “knee boards” that I move ahead of me like stepping stones until the permanent floor is secured.
5. Expert Advice: Managing the “Dew Point”
Tips Pro: When you board over an attic, you are changing the way heat moves through the house. If you board the entire attic from eaves to eaves, you might block the Soffit Vents.
6. Systematic Asset Organization
Once your Attic Floor Boarding is secure, treat it like a warehouse, not a dump.
-
Zone Your Storage: Keep heavy items (like seasonal tires or tools) near the “bearing walls” (where the attic floor meets the walls of the house below).
-
Avoid the Ridge: Keep the center walkway clear. You need to be able to inspect your roof and wiring without moving fifty boxes of holiday lights.
-
Lighting: While you’re up there, install a battery-operated motion LED. It’s a low-cost safety upgrade that prevents trips and falls on the uneven edges of the boarding.
7. The ROI of Vertical Expansion
Home improvement is often about “finding” space where none existed. Professional Attic Floor Boarding can add the equivalent of a small storage unit’s worth of space to your home for the cost of a few weekend trips to the hardware store.
More importantly, it protects your “assets”—your keepsakes are off the damp garage floor, and your insulation is finally allowed to do its job properly. You aren’t just boarding a floor; you are optimizing the “lungs” of your house.
Conclusion: Take Back Your Square Footage
Mastering your attic’s potential is a hallmark of a smart homeowner. By respecting the insulation, ensuring structural integrity through raised legs, and maintaining proper ventilation, you turn a hazardous “void” into a high-functioning storage facility.
The next time you look up at that hatch, don’t see a chore—see a strategic expansion of your home’s capacity.
How much “hidden” space is sitting above your head right now? Are you worried about your joists’ capacity or your insulation’s health? Let’s troubleshoot your attic layout in the comments below!