Precision Angle Engineering: Ensuring Accuracy with the T-Bevel Gauge Tool
Source:https://thewoodsmithstore.com
You’ve spent forty-five minutes measuring the corner of your old Victorian staircase, convinced it’s a perfect 90 degrees. You head to the miter saw, make the cut, and walk back—only to find a gaping, ugly 5-degree wedge staring back at you. In the world of home improvement, there is a painful truth I learned early in my career: “Square” is an urban legend.
In my ten years of restoring historic homes and building custom cabinetry, I’ve rarely met a wall that was truly vertical or a floor that was perfectly level. If you rely solely on a standard speed square, you are fighting a losing battle against physics. That is why the T-Bevel Gauge Tool (often called a sliding bevel) is the most powerful “secret weapon” in my tool bag.
It’s not just a piece of metal and wood; it’s a translator. It speaks the language of the “real world” and translates it into the precise language of your power tools. Today, we’re going deep into how to master this manual marvel to ensure your joinery is seamless, every single time.
1. The Geometry of the “Real World”: Why 90 Degrees Isn’t Enough
Most beginners approach a project with the assumption that houses are built like LEGO sets—perfectly geometric. But houses settle, wood warps, and builders make mistakes.
The T-Bevel Gauge Tool exists because the world is “wonky.” Unlike a fixed square, the T-bevel features a sliding blade that can be locked at any imaginable angle.
The Analogy: Think of a standard square like a fixed-answer multiple-choice test. It’s great if the answer is A, B, or C. But a T-bevel is like an essay question; it allows you to capture the nuance of a corner that is actually 91.4 degrees, ensuring your trim fits like a glove instead of a “close enough” mess.
2. Anatomy of the Tool: Choosing Your T-Bevel Gauge Tool
I’ve gone through dozens of these in a decade. I’ve learned that a cheap, flimsy T-bevel is worse than no tool at all because it gives you a false sense of security.
The Locking Mechanism
This is the heart of the tool. You’ll find two main types:
-
Wing Nut: Easy to tighten by hand, but the protruding nut can sometimes get in the way when you’re trying to lay the tool flat against a saw fence.
-
Recessed Thumb Screw: My personal favorite. It keeps a low profile, allowing the T-Bevel Gauge Tool to sit perfectly flush against any surface.
Blade and Stock Materials
-
Stainless Steel Blades: Non-negotiable. They won’t rust from the sweat on your hands or the humidity in an unfinished basement.
-
The Stock (Handle): While classic rosewood looks beautiful, high-impact plastic or aluminum is often more durable for daily site work.
3. The “Ghost Angle” Technique: How to Use It Like a Pro
In my experience, the biggest mistake people make with a T-Bevel Gauge Tool is trying to read the angle with a protractor immediately. Don’t do that. The beauty of this tool is that you don’t actually need to know the number of degrees to get a perfect cut.
Capturing the Angle
-
Loosen the locking nut.
-
Press the stock (the handle) against your primary surface (like a wall).
-
Adjust the blade until it sits perfectly flush against the secondary surface (like a sloped ceiling).
-
Lock it down tight. Double-check that the blade didn’t “creep” while you were tightening the nut.
Transferring to the Saw
Instead of looking at a protractor, take your locked T-Bevel Gauge Tool directly to your miter saw. Swing the saw blade until it aligns perfectly with the angle of your tool’s blade. This eliminates “mathematical “user error.” You aren’t cutting at “42.5 degrees”; you are cutting at “the exact angle of the wall.”
4. Advanced Joinery: Dovetails and Beyond
For the intermediate woodworker, the T-Bevel Gauge Tool is essential for layout work. If you are venturing into hand-cut dovetails or complex rafters, you’ll use the T-bevel to maintain a consistent “slope” across multiple pieces of timber.
-
Pro Insight: In timber framing, we often use two T-bevels. One is set to the primary pitch of the roof, and the other is set to the plumb cut. Marking these “sister angles” ensures that every rafter sits flush against the ridge board.
5. Technical LSI Checklist: Ensuring Long-Term Accuracy
To get the most out of your tool, you need to treat it with the respect of a precision instrument.
-
Calibration Check: Periodically check your T-bevel against a known 90-degree square. If the blade has a slight “bow” or the stock is warped, your measurements will be consistently off.
-
The “Pencil Lead” Factor: Always use a sharp mechanical pencil or a marking knife when tracing from your T-bevel. A dull carpenter’s pencil can add 1/16th of an inch to your angle, which translates to a massive gap over a long cut.
-
Parallax Error: When aligning your tool with a saw blade, look directly down the line of the blade. Looking from the side can make the angle appear “correct” when it’s actually off by a degree.
6. Expert Advice: The “Hidden Warning” of Wood Movement
Tips Pro: If you measure an angle in a house during a humid summer and wait until the dry winter to make your cuts, the wood may have shrunk or expanded, slightly altering the “real world” angle. I always recommend “Marking and Cutting” in the same 24-hour window to account for the home’s natural respiration.
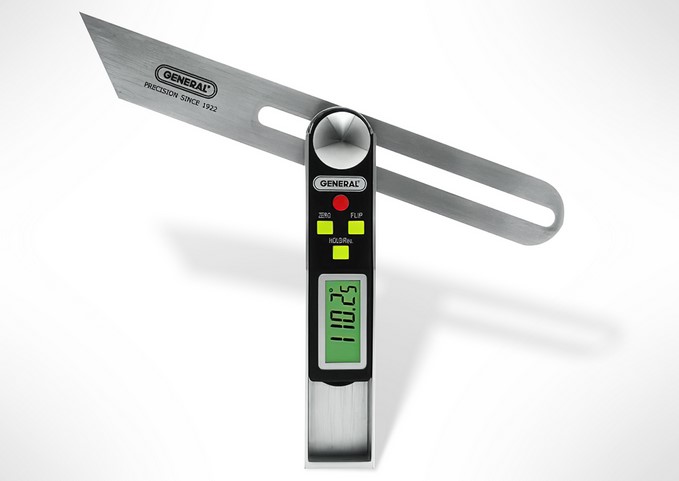
7. Systematic Efficiency: When to Use a Digital Angle Finder Instead
I’m a fan of tradition, but I’m also a fan of finishing my work before dinner. While the T-Bevel Gauge Tool is king for transferring angles, a Digital Angle Finder is better if you actually need to calculate a compound miter.
However, a digital tool can run out of batteries. A T-bevel never does. In my facility organization, the T-bevel is the “analog backup” that never fails. If you are working in a remote area or a dusty environment where electronics struggle, the sliding bevel remains the gold standard.
Conclusion: Bridging the Gap Between Plan and Reality
Mastering the T-Bevel Gauge Tool is a rite of passage for any home improver. It’s the moment you stop forcing the house to be perfect and start adapting your skills to the house’s unique character. When your miters snap together with a satisfying “click” and no wood filler is required, you’ll know the T-bevel has done its job.
Precision isn’t about having the most expensive laser level; it’s about having the right tool to capture the truth of the space you’re working in.
Have you ever struggled with a “mystery angle” that wouldn’t behave? Are you a fan of the classic wooden T-bevel or do you prefer the modern metal versions? Let’s talk shop and solve your trickiest corner problems in the comments below!